You’re about to embark on a vibrant journey into the world of bold makeup with the “Yellow And Black Cut Crease Tutorial” by Toxic Tears. This tutorial promises to infuse your look with striking colors and precision techniques, perfect for those who love merging creativity with their daily beauty routine.
Alongside the step-by-step guidance on achieving this stunning cut crease, you’ll discover how to stay connected with Toxic Tears across various platforms. Whether you’re a goth style enthusiast or someone exploring new makeup horizons, this tutorial encourages you to embrace a unique blend of style and artistry.

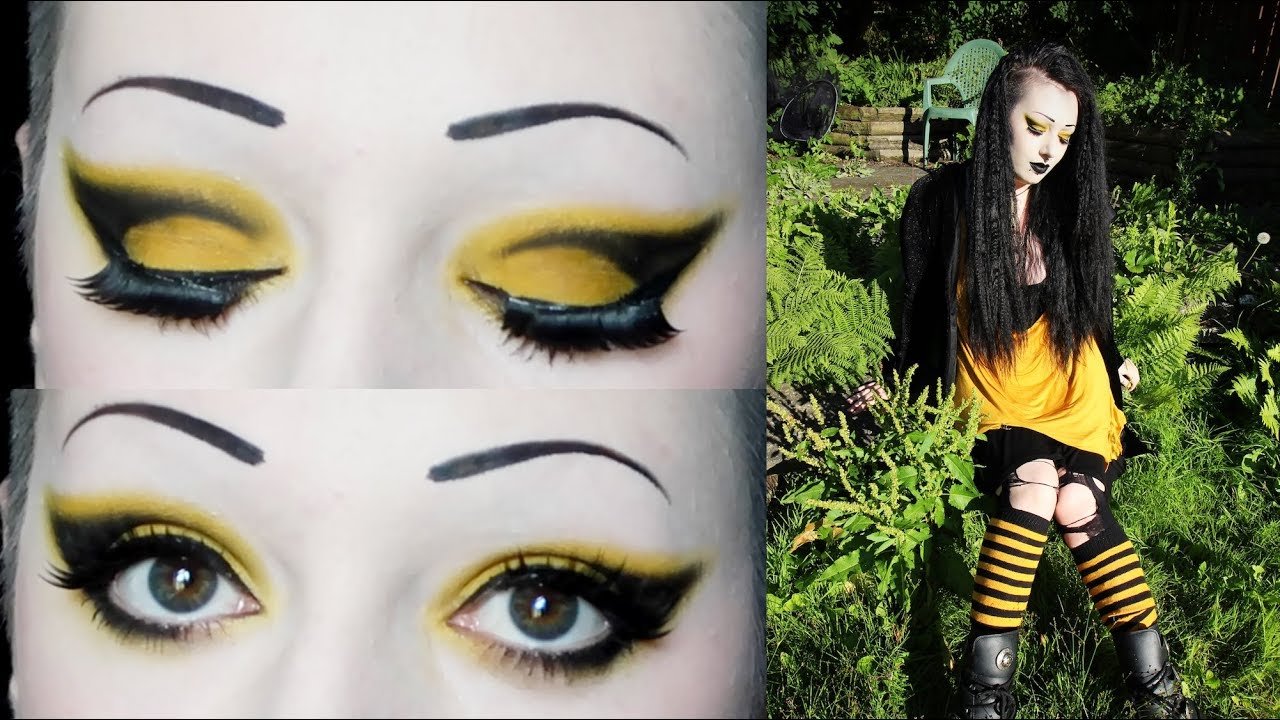
This image is property of i.ytimg.com.
Title Overview
Explanation of ‘Yellow And Black Cut Crease Tutorial’
In the vivid world where life’s canvas is painted with the bright hues of imagination, the ‘Yellow and Black Cut Crease Tutorial’ stands as a striking masterpiece. This tutorial aims to guide you through creating a dramatic, eye-catching look that combines the boldness of black with the vibrancy of yellow. It’s a journey of contrasts, from the shadowy depths to the sunny brilliance, wrapped around the precision and artistry of a cut crease technique. You’ll learn to blend these colors seamlessly while adding depth and drama to your eyes.
Introduction to Toxic Tears
Imagine stepping into a realm where creativity and passion for makeup meet; this is the world of Toxic Tears, also known as Kaya Lili. Her platform is a treasure trove of goth-inspired beauty, fashion, and lifestyle content that invites you to express yourself through art. With her engaging tutorials and vibrant personality, Toxic Tears is dedicated to guiding you on your beauty journey. She combines an artistic flair with a genuine warmth, inspiring you to explore and experiment, to try something new and bold, much like this Yellow and Black Cut Crease look.
Materials Needed
List of Makeup Products
To embark on this creative venture, you will need a specific range of makeup products. Start with a good foundation and concealer that match your skin tone, a vivid yellow eyeshadow, deep black eyeshadow, and a reliable eye primer. A selection of brushes will assist you in application; an eyeliner, mascara, and highlighter are essential to finish your look. You might also find having a setting powder, contour palette, and a creamy concealer critical for achieving a polished appearance.
Necessary Brushes and Tools
As you set up your workstation, gather a variety of brushes to help you with precision. A flat concealer brush will define the crease, while a blending brush is crucial for smooth transitions between colors. You’ll also need an angled eyeliner brush for detailing. Having a small, dense brush can help with packing on the color, while a fluffier brush is ideal for blending and softening edges.
Optional Accessories
While not necessary, consider having the following optional accessories at your disposal to elevate your look. A pair of false lashes can add drama and intensity to your eyes, taking the effect to a more glamorous level. Additionally, glitter or shimmer powder can provide an extra touch of sparkle to your creation, while colored contact lenses could offer a transformative impact, allowing your makeup to truly pop.
Preparation Steps
Skin Care Routine Before Makeup
Think of your skin as a canvas that requires careful prepping before any masterpiece can be created. Begin with cleansing to remove any impurities, then hydrate your skin with a soothing moisturizer that caters to your skin’s needs. Apply your favorite face serum for added nourishment. Don’t forget the eyes—use an eye cream to ensure that your eyelids are soft and ready for makeup, preventing any creasing or dryness.
Setting Up Your Workspace
Your creativity flourishes in an environment that’s organized and inspiring. Set up your workspace by laying out all your materials systematically, within easy reach. Ensure your lighting is good so you can see the true colors you’re working with. A clean mirror is your best ally as you embark on this tutorial. Use it to critically assess your techniques, ensuring evenness and precision throughout the process.
Priming the Eyelids
Properly primed eyelids can make or break your look. Use an effective eye primer to ensure that your makeup will adhere well and stay vibrant throughout the day. Apply a small amount and spread it evenly across your eyelids. This will enhance the color payoff and ensure the pigments remain bold and don’t move into unwanted areas as you create your look.
Creating the Base
Applying Foundation
Your foundation acts as the backdrop for your vibrant eye look. Choose a formula that works well with your skin type, whether that’s dewy, matte, or full-coverage. Apply it using a beauty sponge or brush for a flawless, even application. Blend it seamlessly into your skin, extending it beyond the jawline to ensure there are no noticeable lines, creating a smooth, even-toned base for what’s to come.
Setting the Foundation with Powder
With your foundation applied, lock everything in place with a setting powder. This ensures that your foundation remains steadfast, especially during long days. Use a large, fluffy brush to dust the powder lightly across your face, focusing mainly on areas where makeup tends to break down like the T-zone. This step will provide longevity and a matte finish to your base, creating the perfect canvas for your art.
Contouring for Depth
To give your face structure and dimension, introduce contouring into your routine. Select a contour shade that complements your skin tone, applying it to areas like under your cheekbones, along your jawline, and forehead. Blend thoroughly to create natural shadows. This process will enhance your features, offering definition, and making your final look remarkably sophisticated.
Starting the Cut Crease
Choosing the Right Eye Primer
A great eye primer is your most essential companion in achieving a flawless cut crease. It helps secure the eyeshadow, prevents creasing, and ensures the colors appear as vivid as possible. Apply it carefully over your eyelid, ensuring it reaches the nooks and crannies where pigment will be laid.
Applying the Black Shade
The journey into contrast starts with the application of the black eyeshadow. Choose a shade that is richly pigmented and easy to blend. Apply it to the crease using a dense eyeshadow brush, building up the intensity gradually. Remember to stay focused on the outer V of your eyelid, as this will provide depth and drama, working as a base for your colors.
Blending Techniques for Smoky Effects
Blending is where the magic truly happens, enabling you to transition seamlessly from one pigment to another. Use a clean blending brush to soften the edges of the black eyeshadow, fanning it out slightly for a smoky effect. Blend in small circular motions, as this helps create a graduated effect where the color appears to fade naturally.
Adding the Yellow Shade
Selecting a Vibrant Yellow
Selecting the right shade of yellow is crucial to achieving this look. Opt for a palette that boasts bold, vibrant pigments that will stand out against the black. Look for yellows that hold their intensity and don’t turn chalky when applied.
Blending Yellow into Black for Contrast
Using a small, dense brush, press the yellow eyeshadow into the inner and mid-sections of your eyelid, bringing life and illumination against the dark. The key is in the blend; where the two colors meet, blend gently to create a seamless gradient, dark fading into light.
Tips for Intensity and Brightness
To ensure that your yellow remains bright and striking, consider applying a white base before the yellow shade. This will ensure maximum color payoff. You can also dampen your brush slightly before picking up the product. Build the intensity layer by layer, remembering that patience with blending is vital for a balanced, clean look.
Defining the Cut Crease Line
Using Concealer for Precision
Now it’s time to cut the crease with precision using concealer. A flat concealer brush will be your best ally. Carefully carve out the crease line directly over your eyelid, removing excess shadow to reveal a clean, sharp line. This step helps to emphasize the yellow shadow, serving as a border that separates the elements.
Tools for Achieving Clean Lines
Achieving a sharp cut crease requires steady hands and the right tools. Consider makeup wipes or cotton swabs soaked in makeup remover to clean up any smudges along the edge. Precision tools like small angled brushes can assist in perfecting and refining any lines that need extra attention.
Reapplying Color for Clarity
Once the crease has been cut, reapply your eyeshadow colors with added precision. Ensure the yellow is vivid and refreshing this section can involve adding back in warmth and saturation to maintain the clarity that a well-defined cut crease look demands.
Enhancing the Look
Adding Eyeliner for Definition
Introduce an eyeliner to your look to frame your eyes. Go for a sharp cat eye or keep it close to the lash line for just a subtle flick. A liquid or gel liner will work best for achieving a bold line that will last through the day. This addition not only adds definition but also helps balance the boldness of the yellow and black.
Applying Mascara and False Lashes
Finish your eye makeup by adding several coats of mascara to your lashes, emphasizing length and volume. To dramatically enhance your look, consider adding false lashes. They open up the eyes and complement the chic, bold flair you’ve crafted. Whether you go for something wispy or a more voluminous option, lashes anchor the dramatic elements of your eye makeup.
Final Touches with Highlighter
A swoop of highlighter on the brow bone and inner corners of your eyes can make your eyes pop further. It works alongside the yellow shade, especially if it has a yellow or golden undertone, to reflect light and add a harmonious glow. Don’t forget to dust some highlighter on the tops of your cheekbones for a cohesive finish.
Troubleshooting Common Issues
Fixing Uneven Lines
It’s natural for lines not to appear as perfect as you envision right away. To fix uneven lines, return to your flat brush and carefully refine with a concealer, using small, precise strokes to correct any mistake. Patience is key, think of it like sculpting your own work of art.
Blending Mistakes
Blending may sometimes feel like a complex puzzle. Remember, it’s always easier to add color than remove it. Start small, build up, and blend between each application. If you oversaturate an area, a clean brush can be used to diffuse the colors for a softer effect.
Dealing with Fallout
Any eyeshadow application carries the risk of fallout, with black and yellow being no exceptions. Use a translucent powder beneath your eyes to catch any fallout, which can be swept away easily with a fluffy brush afterward. Alternatively, complete your eye makeup before moving onto your face if you are concerned about a clean finish.
Conclusion
Encouragement to Practice
Remember, each stroke of the brush is a step on an expressive journey. Practice is your loyal companion on this path to finesse the yellow and black cut crease to perfection. Every attempt brings you closer to creating a look that is uniquely yours.
Invitation to Engage with Toxic Tears Content
If this journey into the world of colors excited your spirit, consider diving deeper with Toxic Tears. Her wealth of goth-inspired tutorials can serve as a continuous spring of creativity. With encouragement and insight, she opens the door to endless endeavors where beauty and self-expression reign supreme.
Final Thoughts on Achieving the Look
The Yellow and Black Cut Crease is more than a look; it’s an expedition into the art of contrasts and expressions. It’s about letting the duality of these colors reflect facets of light and darkness, boldness and subtlety, knowing each effort hones your artistry. Every sweep of color, every attempt at blending, speaks to your bravery in embracing the canvas of your own creation.