Get ready to explore the striking art of makeup with the Black & White Cut Crease Eyes tutorial by the talented creator, Toxic Tears. You’ll discover the transformative powers of bold contrasts and precise lines, turning your eyelids into a stunning canvas. This video guide is perfect for anyone eager to harness the elegance and drama of a cut crease look.
As you follow along, you’ll gain insight into the techniques and tips that make this makeup style truly unique. Whether you’re a beginner or an experienced enthusiast, you’re in for an exciting and creative journey. Embrace the power of black and white, and let your eyes do the talking.

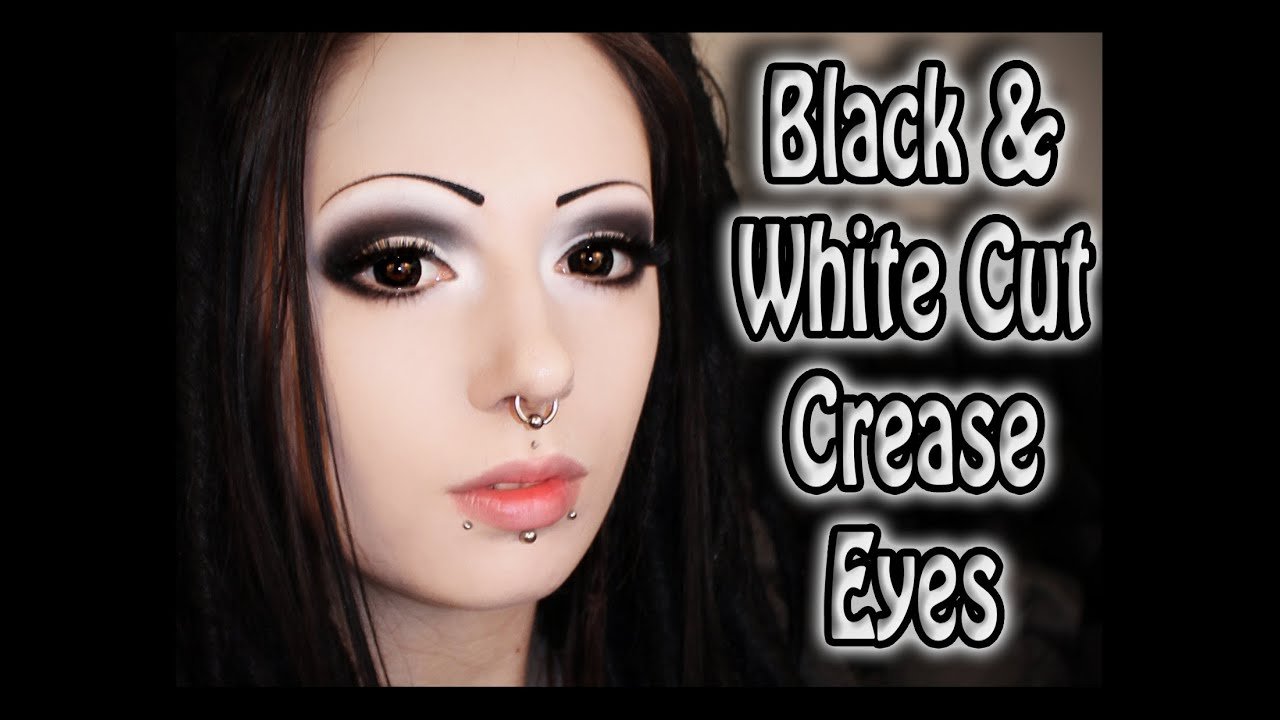
This image is property of i.ytimg.com.
Understanding the Cut Crease Technique
Definition and history of the cut crease
Imagine yourself as an artist with a paintbrush poised over the canvas. The cut crease in the world of makeup is akin to that deft stroke, where precision meets creativity to craft a mesmerizing visual masterpiece. Born from the world of fashion and cinema, the cut crease technique defines and dramatizes the eye by sculpting with shadow. Historically, this technique emerged in the 1960s, becoming a quintessential part of makeup artistry that sought to emphasize and enlarge the appearance of the eyes. It creates a distinct separation that highlights the eyelid and can transform any gaze into something outright bewitching.
Advantages of using a cut crease in makeup
With its rich legacy, using a cut crease in makeup comes with several advantages that assure you not only of its aesthetic appeal but its transformative potential. First and foremost, the cut crease enhances the shape and depth of your eyes, making them appear more defined and vivid. It serves as a spotlight, highlighting the natural contours and adding dimension. Moreover, this technique is versatile, adaptable to various styles, from subtle daytime elegance to full-on glamorous drama. It’s a great way to experiment with colors, textures, and techniques, offering you a repertoire of looks that suit any occasion.
Popular variations and styles
The beauty of the cut crease lies in its adaptability. You can indulge in countless variations and styles that align with your personal aesthetic or the mood of an event. Among the popular styles is the classic cut crease, often featuring neutral tones with a bold line of contrast. For the adventurous, the double cut crease adds an extra layer of intrigue with parallel lines. Then there’s the halo effect, which introduces a radiant glow at the center, creating a celestial feel. Whether opulent or understated, each style is a canvas on which you can express your personality and imagination.
Gathering the Necessary Materials
Choosing the right eye palette for black and white shades
Embarking on your cut crease journey, your eye palette becomes your toolkit for creation. When choosing shades for a black and white cut crease, seek a palette that offers high pigmentation and a smooth blend. A monochrome palette works beautifully, allowing you to play with shades of black, white, and the intriguing gradients in-between. Ensure the white is a true, clean slate, and the black is a rich, velvety tone that can stand its ground as a defining shadow. These hues will anchor the visual narrative of your makeup and act as the blueprint for your expressive look.
Essential brushes and tools for application
Your choice of tools is just as critical as the colors you apply. Invest in a set of precision brushes, each catering to the nuances of your technique. The angled brush will become your ally in sculpting those sharp lines, while a dense flat brush is perfect for packing color onto your lid. Blending brushes smooth out lines and soften transitions, crucial for a seamless gradient. Don’t forget a crease brush to create that all-important line that defines ‘cut crease.’ Lastly, an eyelid primer and setting spray will ensure your work of art stands the test of time.
Extra products for enhancing the look
To elevate the cut crease from striking to show-stopping, consider additional products that can enhance its impact. A good quality eye primer ensures colors remain vibrant and prevents creasing. Glitter or shimmer is perfect for adding a dazzling finish, catching the light with every flutter. Eyeliner, whether gel or liquid, sharpens the look and frames your eyes. Adept use of mascara or false lashes increases volume, adding drama and depth. Finally, a reliable setting spray keeps your efforts intact, warding off smudges and allowing your beauty to last from dawn till dusk.
Preparing Your Eyes for Makeup
Cleansing and moisturizing the eye area
Before you wield your brush with the grace of an artist, it’s essential to prepare the canvas of your eyelid. Begin by cleansing your eye area thoroughly to remove any lingering oils or makeup traces, paving the way for a fresh application. Follow this with a gentle moisturizer, hydrating the delicate skin around your eyes. This step not only nourishes but creates a supple base, lessening the chances of creasing. Allow the moisturizer to absorb fully, setting the stage for the products to follow, ensuring a smooth and comfortable wear throughout the day.
Applying primer for long-lasting wear
Primer serves as the unsung hero in your makeup regimen. By applying a thin layer to your eyelids, you’re laying the groundwork for everything that comes next. A good primer locks in color vibrancy, prevents creasing, and extends the wear of your eyeshadow — crucial for the cut crease’s longevity. Dab on a small amount with your fingertips or a brush; wait a moment until it sets and is slightly tacky. This stickiness works to grip the pigments, giving your cut crease the vibrance it needs to shine through hours of wear.
Selecting the right base shade
Once your canvas is prepared, the first splash of color sets the tone for your creation. For a cut crease, choosing the right base shade is pivotal. Opt for a neutral tone, something in a matte finish that complements your skin and the deeper drama yet to come. This shade will serve as the backdrop, accentuating the richness of the black and the stark white. Use a soft, fluffy brush to apply this color evenly across your eyelid, extending slightly beyond your crease to ensure full coverage for subsequent layers.
Perfecting Your Base Layers
Applying a neutral shadow for an even look
Now, your artistry begins to take true form. A neutral shadow sets the foundation for a cohesive and smooth visual. Select a color slightly darker than your skin tone. Sweep it gently across your lids, ensuring even coverage. This neutral shade enhances depth without overshadowing the dynamic black and white duality of your cut crease. It prepares the eyelid, creating a blank yet defined stage from which your colors can emerge. Confidence in your base is confidence in the certainty of your final masterpiece.
Blending techniques to achieve a smooth base
Blending is an art within itself — a delicate dance of softening hard edges and creating fluid transitions. With your blending brush in hand, work the neutral shadow into the crease, employing back-and-forth wiper-like movements. This technique ensures even application without harsh lines, which could disrupt the harmony of your look. Practice patience as blending is about attention to detail and the pursuit of flawlessness. Your goal is a seamless foundation that highlights the precision of the upcoming cut crease.
Tips for setting the initial layers
Setting your base layers is akin to securing the foundation of a building. To lock everything in place, use a translucent setting powder, lightly dusted over your eyelid. This ensures longevity by absorbing excess oils and evening out any textures that might interrupt the following steps. Use a soft brush and a gentle hand; too much powder will create cakiness instead of the desired smooth canvas. This perfectly finished base is now set for the elaborate artistry of your cut crease.
Crafting the White Cut Crease
Choosing the right brush for precision
The cut crease begins with choosing the perfect brush, a tool that grants you precision akin to an artisan’s chisel. A flat, angled brush will be your choice; it offers a blend of rigidity and softness, ideal for carving out the line. Alternatively, a pointed liner brush offers accuracy for delineating the stark white line across the crease. With tools in hand, you are prepared to define the crease clearly against the gentle neutrals established as the foundation.
Techniques for applying white shadow
White is your highlighter, your beam of light cutting through the shadows. This is the moment where your skills with shadows and form shine through, chiseling the final detail. Use the selected angled or liner brush to apply the white shadow directly to the crease line, maintaining a steady hand to ensure an even and precise line. Remember, the key to applying white is to build cautiously — layering just enough to achieve pigment while avoiding heaviness. This ethereal line forms the division of color, setting the stage for the dramatic contrast with black.
Blending and smoothing out harsh lines
The art of a cut crease, while celebrated for its structure, benefits from a touch of softness between differing tones. Once the white line is defined, blend slightly along its edges with a clean blending brush to erase any harsh lines that look out of place. This soft tailoring will not compromise the definition but will transition naturally, inviting the deeper shades into harmony. The brushstrokes should be gentle, coaxing rather than commanding, ensuring the white retains its crisp brilliance alongside the black.
Adding the Black Definition
Selecting the perfect black shade
The black in your palette is the gravity holder, lending gravity that accentuates the brightness of the white. A rich, matte black delivers depths that shine with sophistication. Test different black shades within your palette to ensure that the pigment offers both depth and evenness. A black with a slightly creamy consistency will apply smoothly and adhere well, forming sharp lines that are velvet to the touch.
Achieving sharp lines with black shadow
Crafting the cut crease’s contrast begins with achieving sharp lines with black shadow along the defined white crease. Use a fine-tipped brush or angled brush — precision is your ally. Gently follow the arc crafted by your white shadow, applying the black directly above or slightly along the white edge. The contrast creates a dynamic, sharp line that defines the look’s dramatic essence. Feel confident with quick, sure strokes, capturing the essence of the cut crease fashion.
Blending to balance contrast
The secret to a compelling cut crease isn’t just in the defining lines but in the balance of contrasts. With an attention to detail, gently blend the black upwards, into the base shade previously applied. Whisk away any intense or abrupt changes with a smaller, compact blending brush to maintain the integrity of the line. This blending creates a gradient that retains crispness yet improves wearability, making the look fluid yet striking. Balance — the artful interplay of dark and light.
Enhancing the Look with Additional Details
Incorporating shimmer or glitter elements
For a touch of glam that catches every eye, consider adding shimmer or glitter. These elements add dimension and playfulness to your look, shimmering elegantly under the light. Apply with a fingertip or a flat brush lightly, concentrating on the center of your eyelid or the innermost corners. This sparkle breathes life into the monochromatic look, echoing the spirit of joyful experimentation that makeup embodies.
Crafting the perfect winged eyeliner
The winged eyeliner is the perfect companion to a cut crease, echoing its structured elegance. A liquid or gel liner achieves this look, allowing smooth, precise lines. Start from the inner corner of your eye, tapering outwards into a graceful wing. Symmetry is key; keep both sides even, like a gentle swoop of a swallow’s wing. This crafts a cohesive visual, framing the vibrant cut crease with elegance.
Using mascara and false lashes for volume
To create captivating eyes, use mascara and an optional false lash. Mascara lengthens and adds volume to your natural lashes, while false lashes enhance further drama. Apply mascara by wiggling the wand from the base to the tip of the lashes. For lashes, take the time to choose a style that complements your natural shape — something that lifts and enhances without overshadowing the cut crease. Secure them with high-quality glue, bonding your artistic nuances into a complete tapestry.
Perfecting the Look: Final Touches
Touch-ups for precise lines and edges
After creating your masterpiece, take a step back and examine the finer details. Check for any smudges or uneven lines, and retouch as necessary. Use a cotton swab for minor corrections or a makeup eraser pen for more stubborn mistakes. Precision ensures that every line meets crispness, portraying elegance through the lens of detail and dedication. The result? A flawless portrait of skill and creativity.
Setting spray for long-lasting results
The finishing flourish is a setting spray, securing your artistry for the hours ahead. Hold the bottle about a foot away and spray in an ‘X’ or ‘T’ pattern across your face. This locks the pigments into place, creating a feel that’s unwavering and vibrant, even as the minutes stretch into hours. The spray acts like the varnish on a painting, preserving color fidelity and preventing the work from being swept away by time.
Common mistakes and how to fix them
Every artist faces challenges, and so too will you on your cut crease journey. Often, blending may appear uneven — remedy this by taking a clean brush and softly smoothing the transitions. Should lines appear harsh, employ a gentle blending to soften them, or use concealer for clarity. If your glitter spreads, apply with a damp fingertip or brush. Mistakes are opportunities for learning, guiding you toward perfection with experience.
Styling Tips for Complementing Looks
Choosing accessories that match the look
To complete your charm, select accessories that reflect your look’s elegance and allure. Opt for monochromatic or metallic jewelry, which complements the color theme without overshadowing it. Accentuate with pieces that capture the sparkle of your makeup — perhaps a silver necklace or bold black earrings. Your look can remain cohesive, as the accessories become a natural extension of your creativity rather than an afterthought.
Hairstyles that complement a cut crease
Your hairstyle should uplift your cut crease, not overwhelm. Soft curls or sleek, pulled-back styles let your eyes be the focal point. Consider an updo or ponytail that provides the perfect stage for the vivid drama of your cut crease. Uncover your visage fully, letting your eyes narrate the story you’ve so intricately painted. Rustic braids or smooth waves alike can frame the masterpiece, adding layers of sophistication.
Outfit ideas for a coordinated appearance
Revel in the head-to-toe finesse by matching your outfit with your cut crease. Monochrome choices echo your palette’s motif, a symphony of black and white in symphonic simplicity or striped with boldness. Perhaps a Little Black Dress or tailored white ensemble sets the tone, marrying perfectly with your shadowed artistry. Mix patterns and textures to match the creative spirit, expressing your bold or demure nature through fabric and form.
Conclusion
Summarizing the steps for black and white cut crease
You’ve traveled a journey through techniques and styles, crafting a black and white cut crease that speaks volumes. The crisp white line paired with deep black definition tells a tale of contrast — both striking and elegant. Such a look demands careful preparation, the right tools, and the intricate powers of blending and precision.
Final advice for makeup enthusiasts
To every enthusiast working on polishing their skills: revel in experimentation, as each stroke adds to your expertise. Understanding comes with curiosity, so let each error and success guide your brush for future masterpieces. See every makeup journey as an expression of art, one that dances on the eyelids, narrating unspoken dreams.
Encouragement for experimenting with variations
Experiment – fearlessly. The cut crease comes alive differently each time you attempt it. Dive into a palette of colors beyond black and white, exploring both the daring and subtle. Every variation offers new perspectives, unlocking doors to endless creativity, where you find and harness your individual flair.